Wait a minute. Did you say PowerPoint? Yep. Sure did!

PowerPoint has enough built-in features that it can be quite a useful tool for creating images quickly, without a lot of skill. Granted, you do not get a ton of image editing options like you would PhotoShop. But most social graphics aren’t meant to be works of art. It needs to grab attention first and foremost, and deliver a quick, short message. Like an advertisement.
Having got that out of the way, let’s get started.
1. Create & Set Up A New Presentation
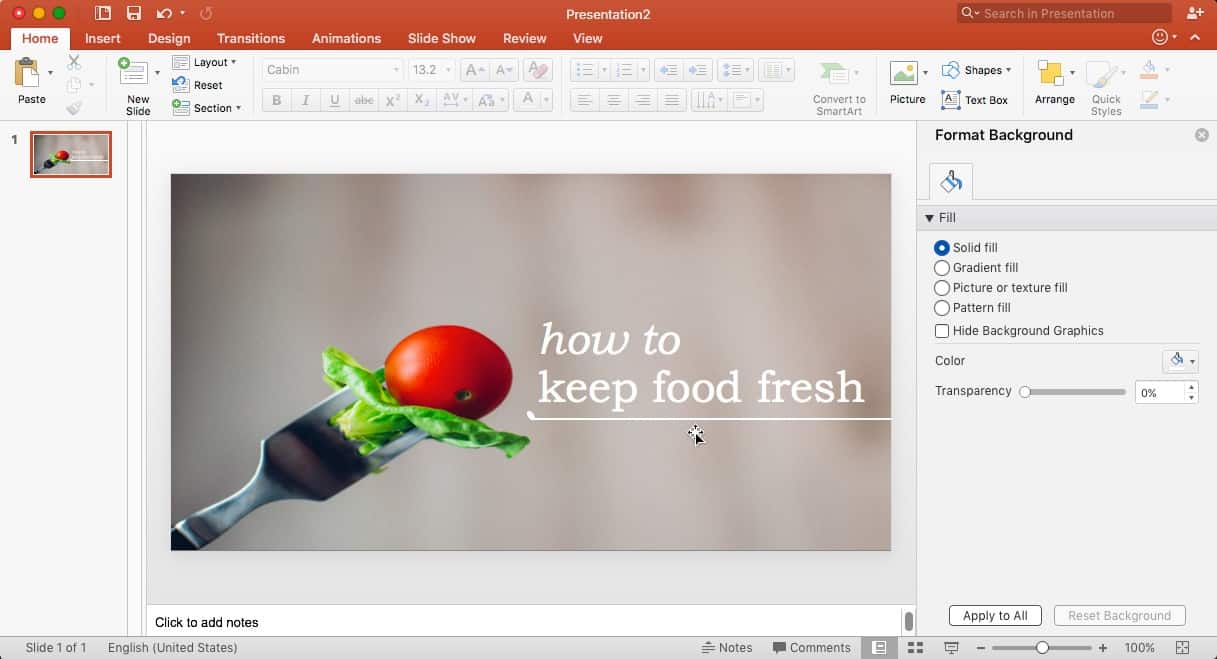
When you start PowerPoint, create a new blank presentation. Next, go to File >> Page Setup… and set the slide up for custom size. Because I am creating an image for Facebook, I will enter 10 inches for width and 5.23 inches for height. This is the ratio for the current shared link image.

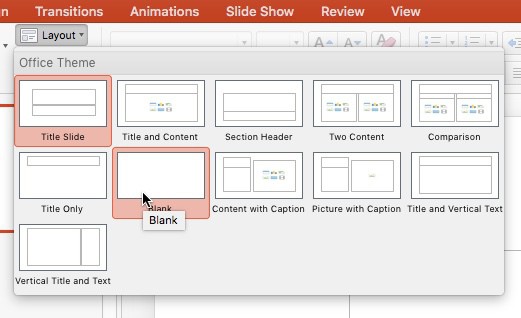
Next, I will make sure to select a blank layout.
2. Source For A Photo
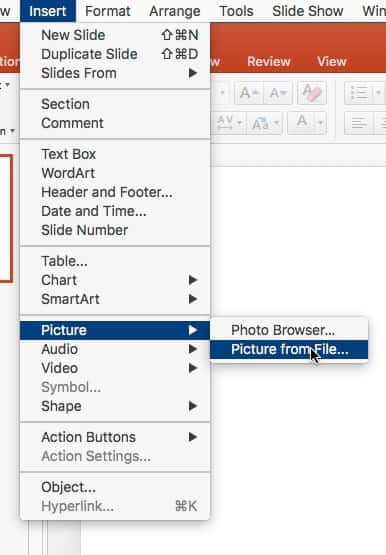
Find a photo that fits your post or your message. You can purchase these from any stock photo site, or get CC0 (free) photos. Once you find one, download it to your computer. Insert the photo into your presentation.
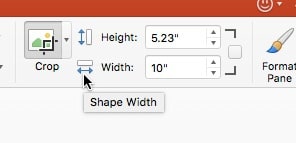
Resize your photo to cover the entire presentation. If your photo is too wide or too tall, you may have to crop it. What I normally like to do is re-size the image to the width (10 inches in this case). Then, crop the image by entering the exact height (5.23 inches), making sure to uncheck the keep aspect ratio box.
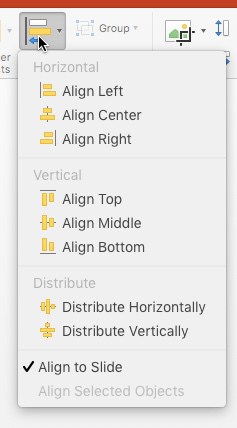
Finally, I’d align the image both center and middle.
3. Add Text
It’s time to add text. You’d do that by adding a text box. Don’t be afraid to create multiple text boxes to break up your text instead of line breaks. Multiple boxes give you more freedom when styling the text. It also lets you position the text where you want, and snap them in place in relation to other objects.

4. Add Visual Elements
Another thing you can add to make the image more interesting are lines, boxes, shapes and even icons. Boxes and lines are the quickest. In this image, I’ll be adding a line. I’ll also add a tiny oval to the end of the line to give it a little bit of flair.
5. Add Your Domain Name
This is so key to social graphics. You want people to come to you. So be sure you brand it. Use your domain name, or use a flat logo that your designer may have created. At the very least, have your website name on it.

6. Export The Slide
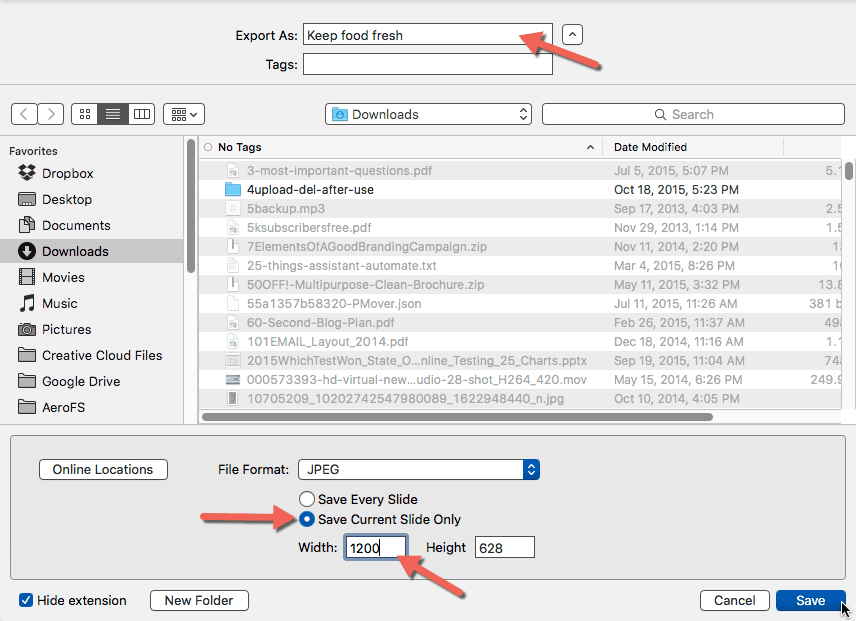
Your final step is to export the slide. Go to File >> Export. Enter a name for your file, make sure you select the option to “Save Current Slide Only”. In the width, enter 1200. The height will adjust accordingly. Save it.
And there you have it. Your Facebook ready image.

All you need to do now is add it to your blog post. If your images come up wrong, follow these steps to get the right images to show up in social networks.
While these are easy to do, one of my biggest challenges is to find great images for backgrounds. I usually buy these off stock photo sites. I wait for big sales with deep discounts and grab a ton of credits. Timing is key here. If you’d like to know when these are available, you can get on my mailing list here or at BlogEnergizer, whichever fits you best.