If you do any kind of business online, you’re bound to have an account in several social networks and you often have a profile page where people can read your last shares. That’s all great, but admit it. It’s sometimes difficult to remember the URLs to these profiles.
Beyond that, I often wonder at marketers – and I admit making this very same mistake – why we are so smart when it comes to creating affiliate redirects but not for social profiles?
Sadly, nothing lasts forever. While I don’t foresee Facebook, Twitter or even Pinterest closing down yet, nothing is set in stone. Great example – Google Reader closing which came as a surprise for many. Truth is, companies cut stuff out all the time. There may not be a rhyme or reason to you but they surely have very legitimate reasons they won’t tell you about. Why would they?
Besides the ‘fear’, what about more practical reasons? Take Facebook Pages as an example. A new Page has to achieve a minimum number of fans before you can request for a unique URL. Most of us just beg our friends and network before we promote the Page. Nothing wrong with that. But an easier way, why not just go ahead and promote it – using your own custom URL? Then, when you do get the new Facebook URL, just switch the redirect.
There are so many benefits for doing it this way:
- Your promotions are consistent – always one URL
- Easier for you & your assistants to remember
- You maintain your branding – Your domain is your brand. Use it.
- You can re-direct traffic if you fall out of love with a network
- You can even display a message (or promo) before sending people to your profile.
There are two ways to do this. A simple/basic folder method or a sub-domain method. I chose sub-domains because I liked they way they looked but really it is up to you. The steps for creating the redirect is similar.
What You Need
- Your own domain
- cPanel
- A list of all your social profile URLs
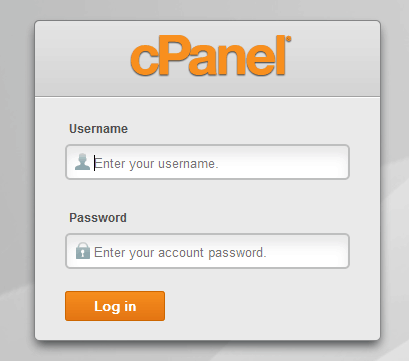
Login to cPanel

This can usually be accessed by going to http://www.yourdomain.com/cpanel in your browser. If in doubt, ask your web host for the URL and credentials.
Go To The Subdomains Manager

Locate and click on the Subdomains icon
Enter your network name

- Enter your network name e.g. Twitter this is *not* case sensitive.
- Make sure you select the correct domain. You may not have a choice depending how your hosting is set up.
- Leave Document Root as default
Go Back To cPanel Home

To continue with the next step, return to cPanel Home.
Go To The Redirects Manager

Locate Redirects icon. It is usually in the same group as your domains.
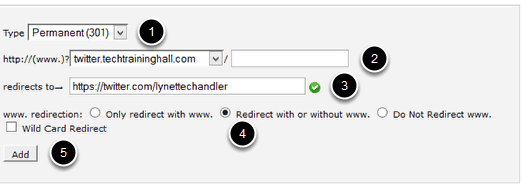
Create Your Redirect

- You may leave type as Permanent (301).
- Select the subdomain you just created. You can leave the other field blank.
- Paste your social network profile URL in redirects to. In this example because we created for Twitter we will enter our Twitter profile.
- Select redirect with or without www just to cover your bases.
- Click Add.
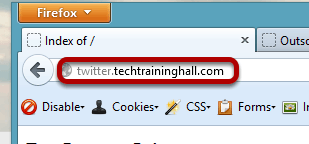
Test Your Redirect

Now that you have done all the steps, enter the subdomain in your browser address bar. In our example, we used http://twitter.techtraininghall.com. Then hit Enter.
Success!

You should be correctly redirected to your social profile. Now, you just repeat the steps for each social network.