Unlike sites of the past where much of it is 100% HTML driven, today you’ll more likely find a site run by some kind of content management system (CMS) or an adapted blog system like WordPress. CMS’s require two parts to run. The files (which is the code itself) and the database. And that also means, when you backup a CMS powered site you have to backup both files/folders and database. If you don’t backup your files and folders, chances are you will lose all your carefully designed templates and themes. If you don’t backup the database, you’ll lose your content (ouch!). Either way it is not pleasant.
In the previous post, we shared how to manually backup your files and folders via cPanel that you might want to check out first. Those of you who know cPanel fairly well may wonder why I don’t use the backup feature within cPanel itself.
Ahh! There is a method to my madness. Because, sometimes all you may want is selected files – like when you’re backing up WordPress to get ready for an upgrade, you don’t want everything else. Also, when doing upgrades, I do not want to download the files to my computer. This is time consuming and seriously I do not want to store so many backups on my computer. I think backups should be stored off my computer like on Amazon S3 but that’s a whole other story. Another reason I like to keep files (and as you will see shortly the database) on site at least during the upgrade process is so I can roll back quickly without having to re-upload everything – once again waste of time and bandwidth. What about backup plugins? – Same issue. I don’t want to download anything.
In this post, we will only walk you through on-site database backup. Here we go.
Log in to cPanel
Locate and click the MySQL Databases icon

Create a new database – it helps if you name it similar to the one you will be backing up. There’s no need to create a user for it since this is for backup purposes only.

Once the database is created, copy the name that is given on the screen, set it aside and return to Home

Locate the phpMyAdmin icon. Click to launch phpMyAdmin

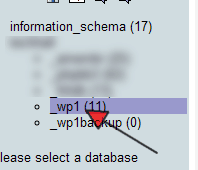
Click the name of the database you will be backing up

Click the Operations tab

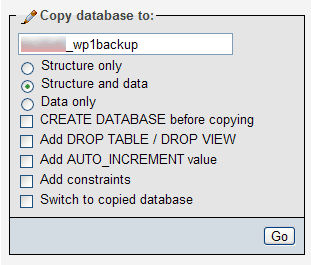
Under ‘Copy Database To’, paste the name of the new database you just created. Uncheck the box that says Create Database before copying and click Go

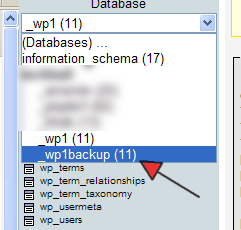
The tables will be copied over to the new empty database.

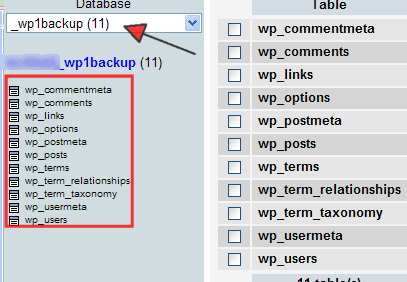
To check if it is there, click the name of the new (backup) database. All the tables should be there.


You’re done!
Next in this short 3-part tutorial series, how to reverse a WordPress upgrade.
Click for part 1, how to backup your website files and folders