How To Go On Facebook Live From Computer
Want to go on Facebook Live from computer? I totally understand why. Facebook Live is a very exciting platform. It brings a lot of interaction with your audience and very important – by being seen on video, people get to know you and like you. That’s something no competitor can take away from you.
Going live on Facebook is super easy normally. All you need is your phone with the app installed or on your computer, with a webcam, just hit the Go Live button anytime. The problem comes when you want to show your screen as well because some things are really hard to describe and you need to show people how, not tell them.
The good news is, there’s an easy way to do this. Best of all, it lets you go live in groups that you belong to, but aren’t an admin of. Before I go forward…
PLEASE be responsible. Not all groups take kindly to you going live. Make sure you have the group admin’s OK before proceeding, if you are indeed going live to a group you do not manage.
Now that we’ve got that out of the way, let’s get started! Your first step is to…
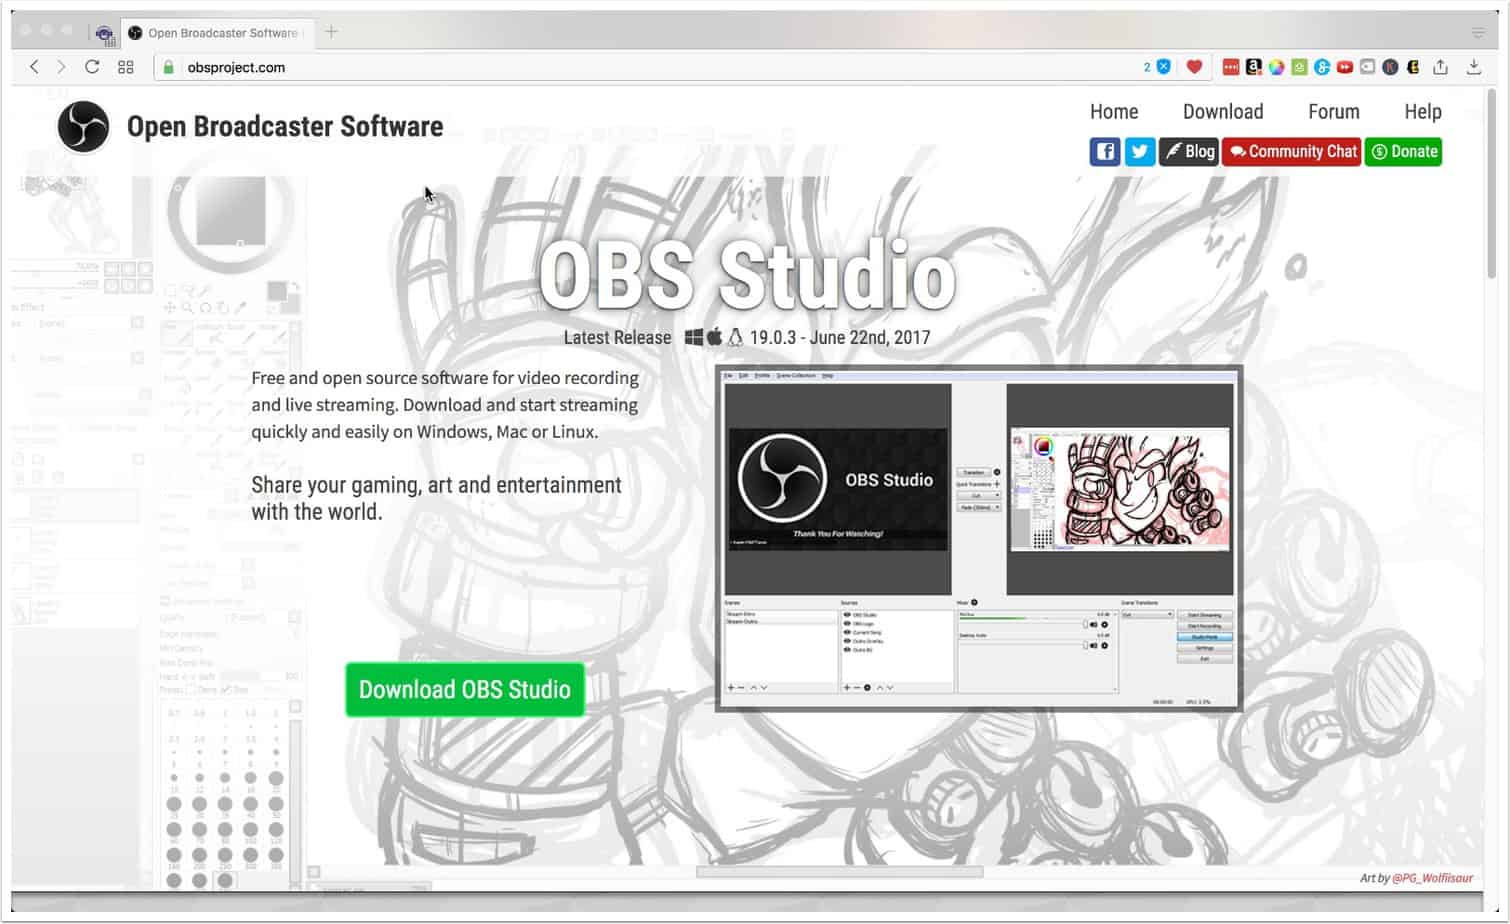
Download & Install the Open Broadcaster Software
OBS is free and available on Windows, Mac and Linux. Visit https://obsproject.com/ to download your copy and install it like any other software you’d install.
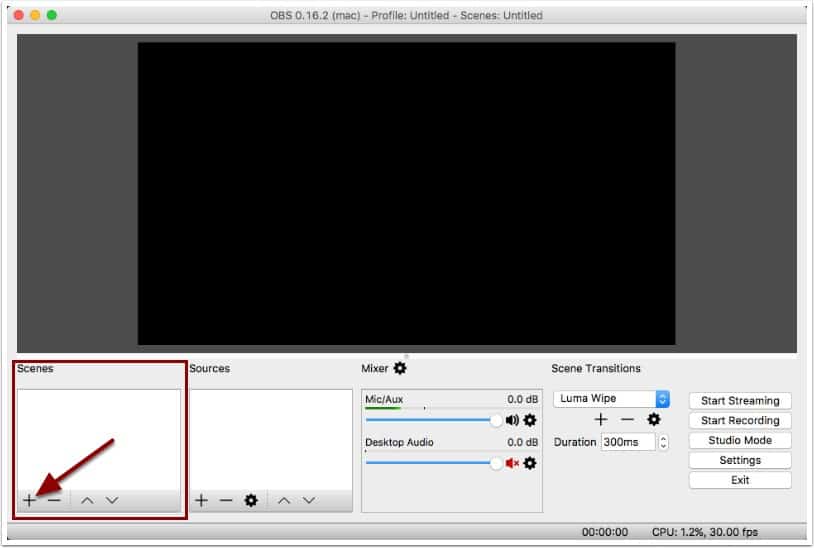
Add A Scene To OBS
When you first open up OBS, you might see a blank screen like this. In order to share your screen or your camera or both, you need to set up video scenes and sources.
Let’s set up your first screen. Click on the (+) under the screens box.
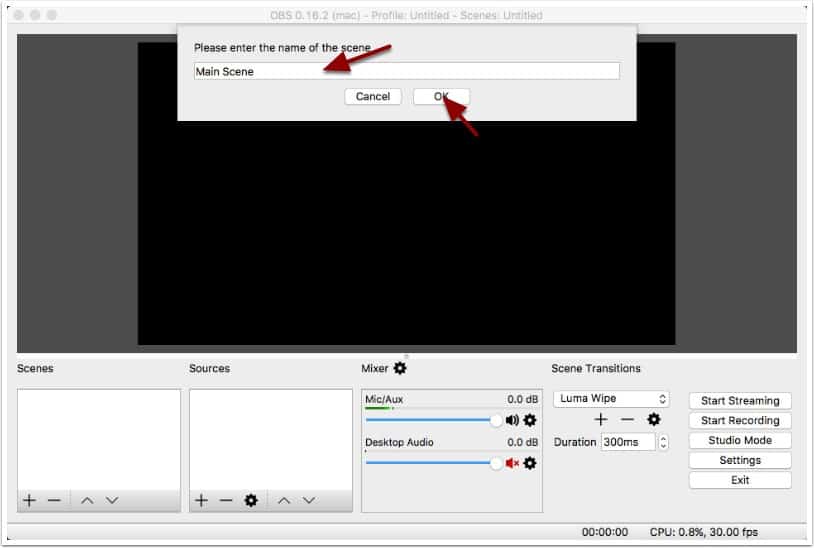
Name Your Scene
Give a name for your scene. To start off, you can simply do something like Main Screen. Click the OK Button.
Screens are like scenes of a movie. Each scene can have multiple video or audio sources and you can switch between screens any time. This is great to achieve cool effects and if you have a lot going on, but for simplicity’s sake, we are only going to work with one scene. You can always come back to play around with this feature later.
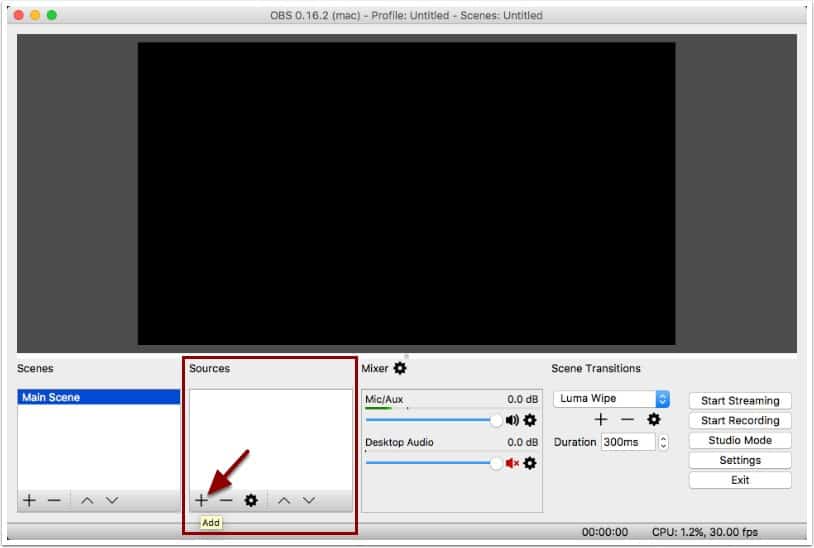
Set Up Your Sources
Next, you’ll set up your sources. You can have all kinds of input sources depending on your hardware. They can also be audio or video.
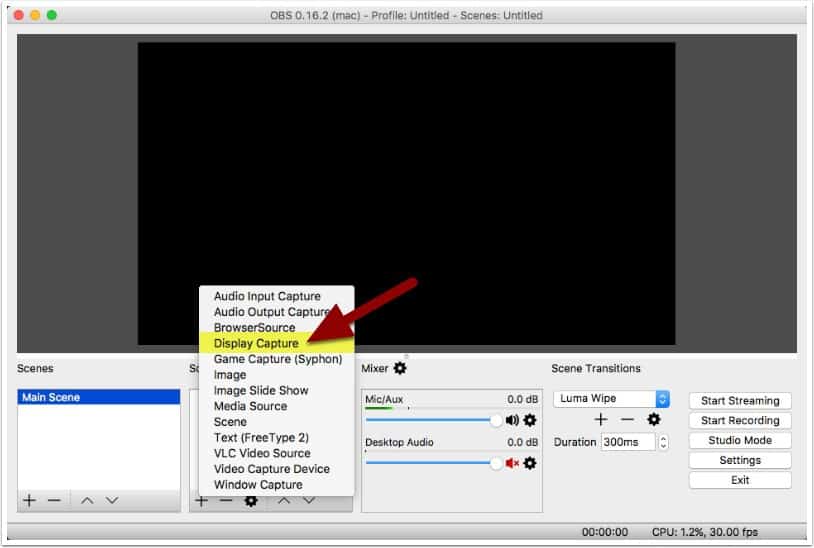
Click (+) under the Sources box.
Using Your Sharing Your Screen or Desktop As A Source
To share your screen or desktop, you’d want to select the Display Capture option.
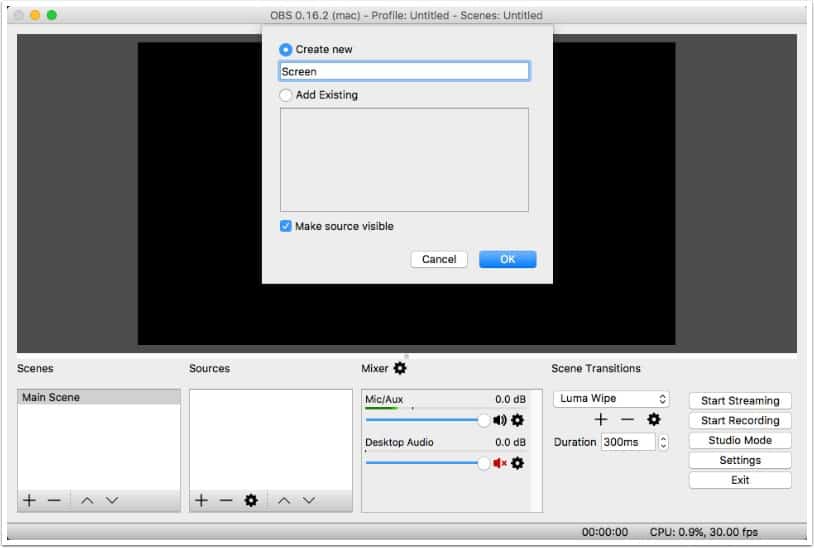
Name Your Desktop Source
You’ll be asked to give a name to your source. If you have two screens or monitors, this might be the time to name them something that makes sense to you for example “Left Screen”, “Laptop Screen”, “External Screen”. Yes you can actually display both monitors are the same time if you wish. But for this tutorial, let’s just set up one, then click OK.
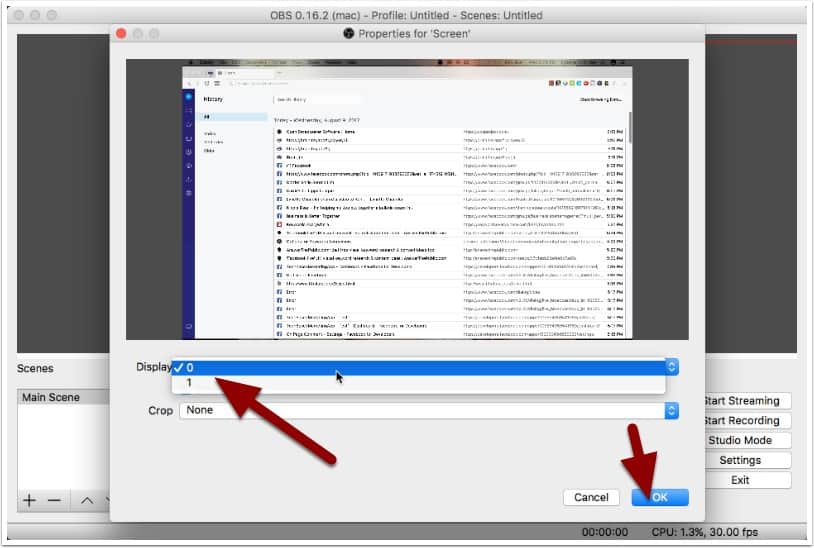
Select Your Monitor
If you have two monitors, this is when you’d select which monitor screen you’d like to share. Click the Display drop down to select, then click OK.
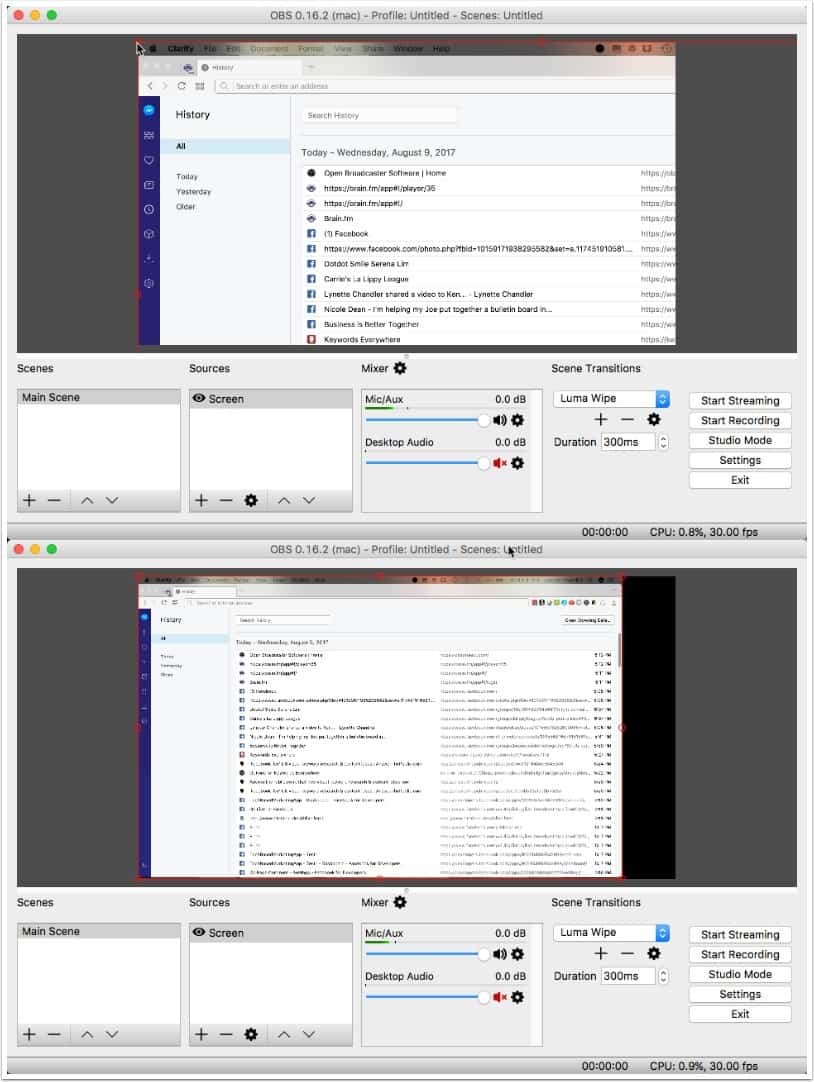
Resize Your Shared Screen
Depending on your monitor, you might find that the screen is very large and cut off. You’ll need to resize your screen by clicking on the red circles at each corner or side to resize and fit into the black portion of the viewer.
The picture below shows the resized screen. It has a black border, meaning your screen does not cover the whole video completely. You can resize it to do so, but I’m not worried about it.
Using Your Camera
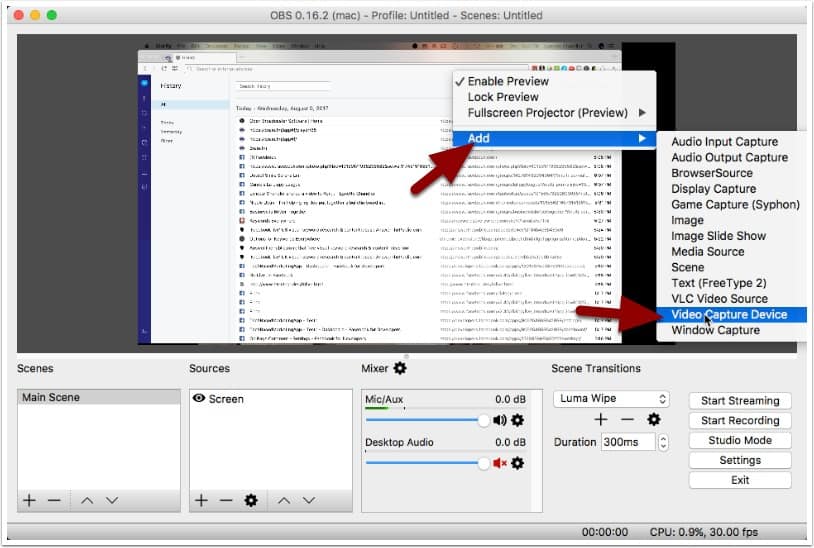
Our next step is to add our web cam as a source because we want to have our face on top of the screen so people can see both us and the screen. To do this, we can click (+) under the Sources box like we did before. Another way to add a new source is to simply right click anywwhere on the viewer, select Add and select your source. For webcam, we are going to choose Video Capture Device.
Name Your Webcam Source
Now OBS will ask you to name this source. If you have two cameras, is wouldn’t hurt to give it a name that makes sense for you. I use a Logitech C920 camera and my MacBook has it’s own HD Camera built in so it makes sense for me to enter “Logitech Camera” here since that’s the one I will use. Click OK.

Select Your Webcam
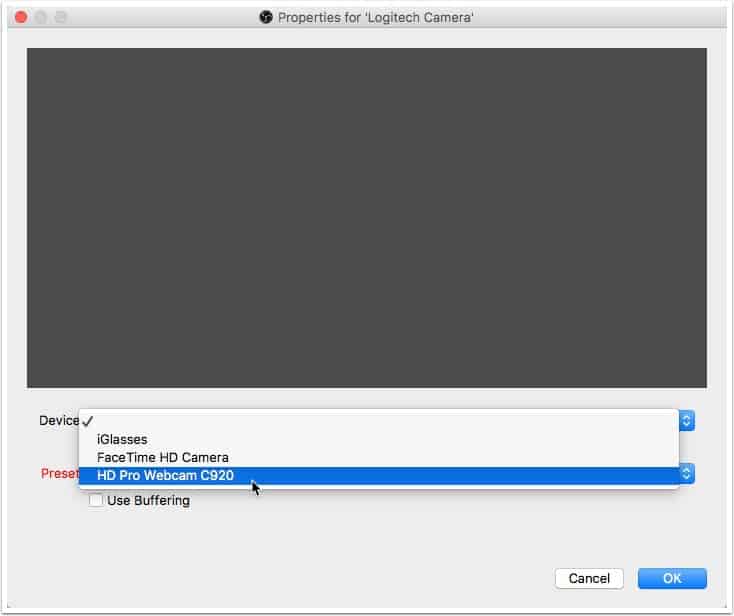
Next, OBS will ask which webcam you’d like to use. Select the webcam of your choice. Click OK.
Position & Resize Your Webcam Source
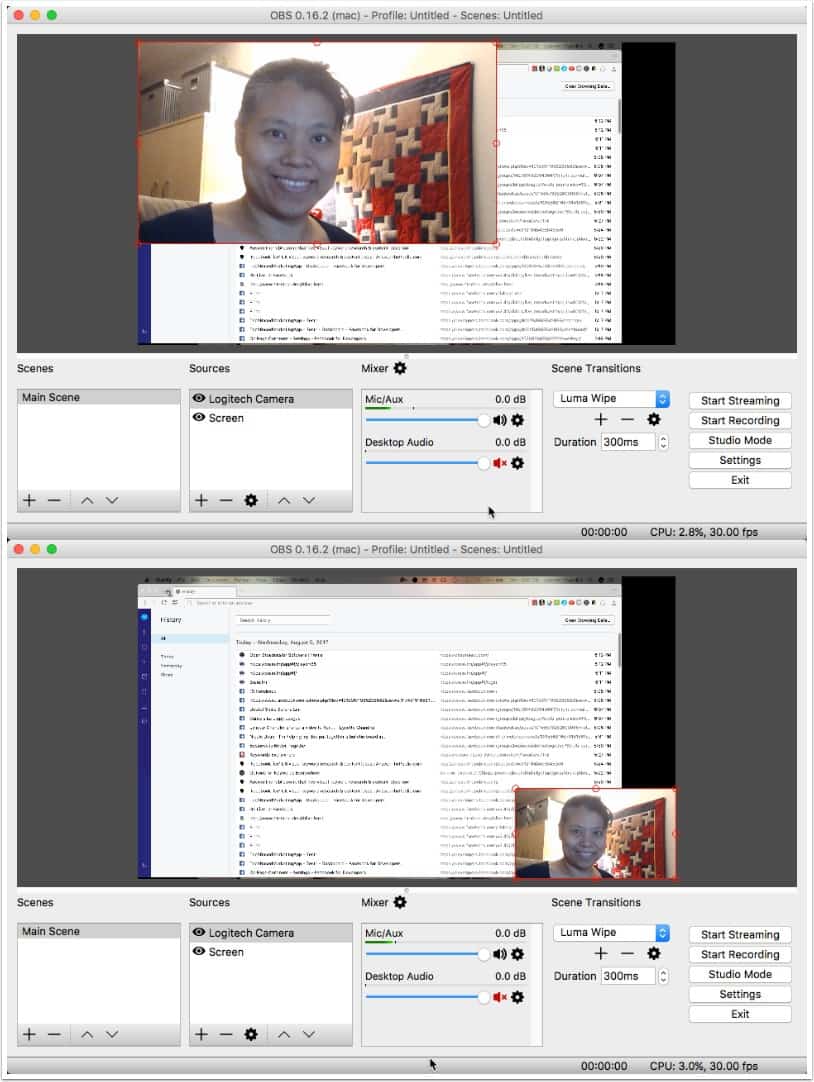
You should now see your webcam video input showing on in your viewer. It’s in the wrong spot of course and too large, obscuring the desktop view. So you’d want to resize it by grabbing and dragging the circles at each corner of the source.
To re-position, simply drag the source you want to reposition. Below, you’ll see I’ve reduced the size of my webcam source and put it in a corner.
Getting Ready To Go Live
In order to go live on Facebook using OBS, you’ll need something called a streaming key. This is not something you can get directly from Facebook itself. It actually requires a little bit of geeky Javascript knowledge. It’s not hard, but I understand not everyone knows how or wants to tackle it. So I made it for you.
At the bottom of this description, you should see a button that says Create Live Stream To Facebook.. Click that. If you downloaded this as a PDF, return to this page to locate the button.
Note: You’ll have to repeat the following steps every time you want to go live. Do bookmark the page so you can return to launch your live stream the next time.
Choose Where To Go Live On
A dialog box should pop up. If it doesn’t, you might have popups blocked. Please unblock popups from techbasedmarketing.com, refresh the page and try clicking the previous button again. Once you see the popup, it’ll look something like this.
- Click the Share On Your Timeline dropdown.
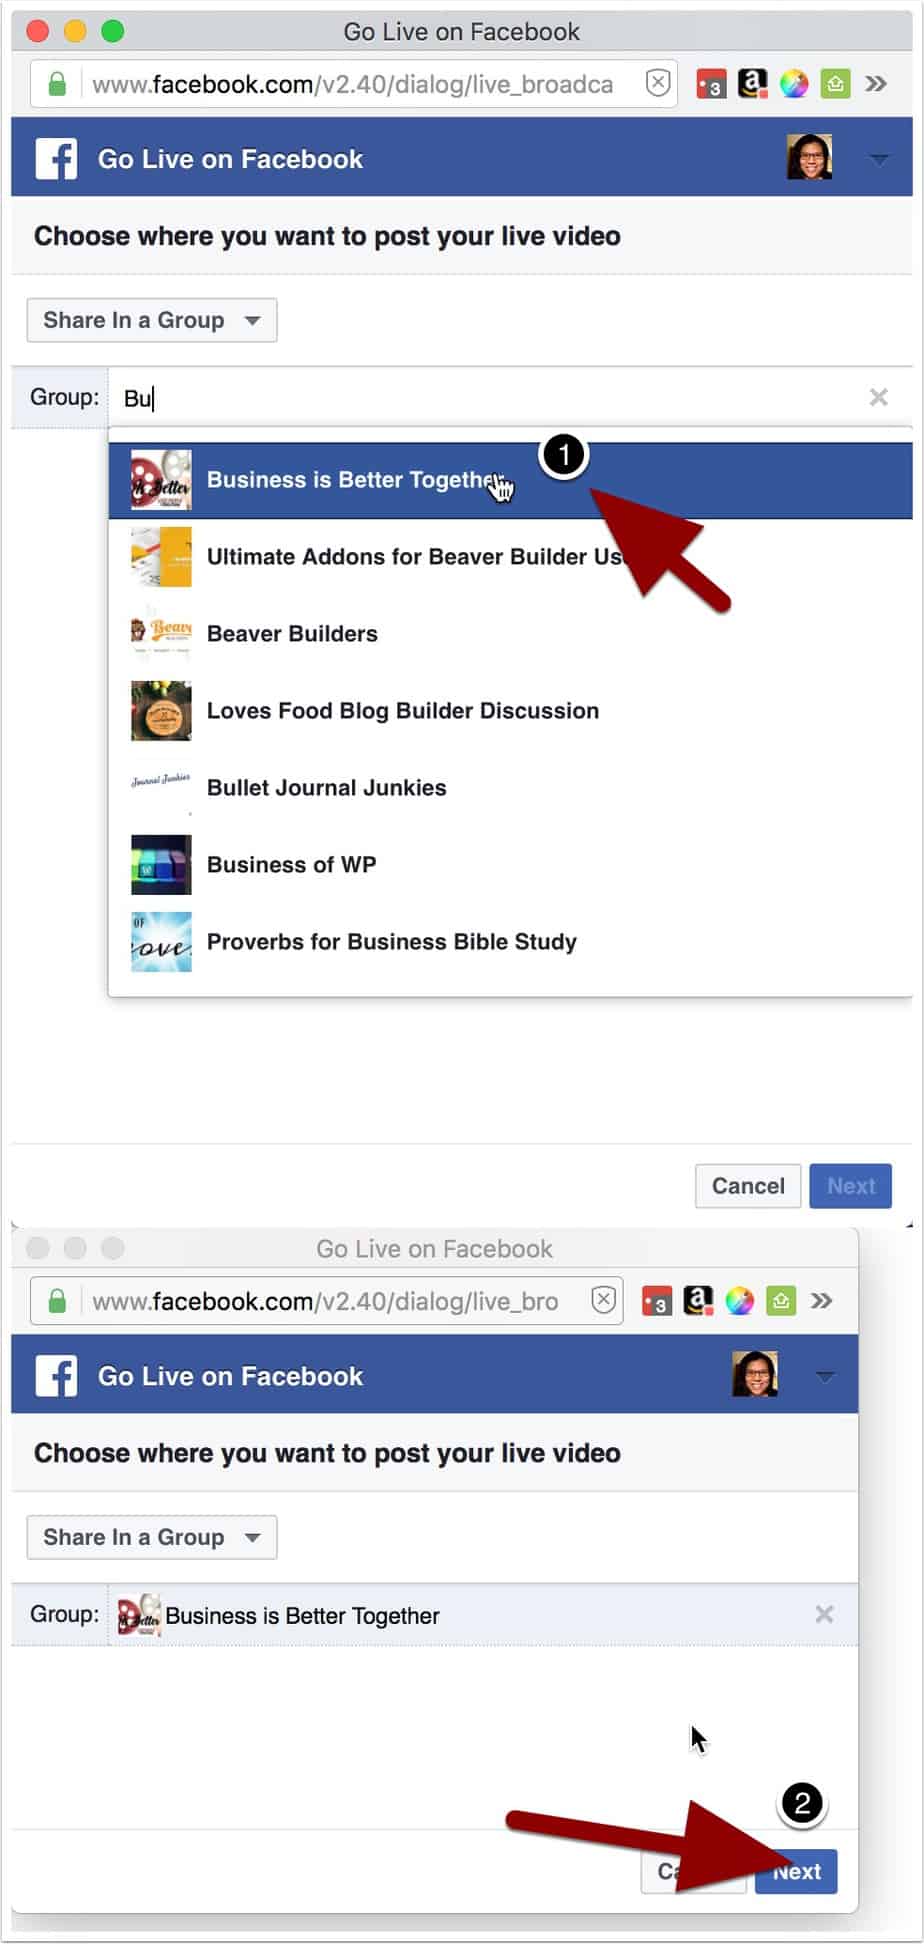
- Select your destination. We want to go live in a group we do not manage or aren’t an administrator of. So we select Share In a Group.

Enter The Name of Your Group
You’ll be shwon a group field. Enter the name of your group. As you begin typing, you will be shown names of groups you belong to as well as manage that match what you type. Select the group you want to go live in, click Next.
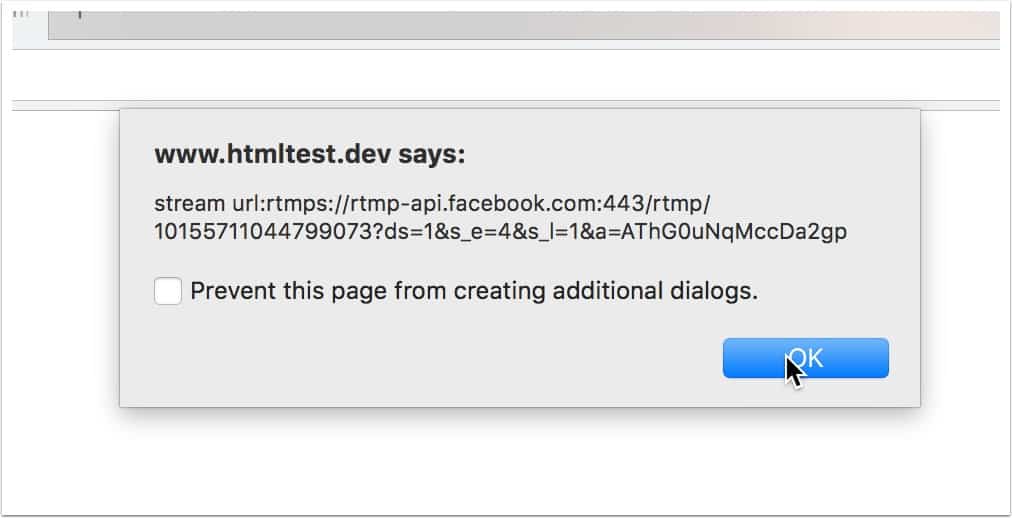
Confirmation
You will then be shown a small confirmation popup on your browser. It’s filled with long strings of text that doesn’t make sense. Don’t worry about it at all. Just click OK.
Create Your Live Post & Getting The Stream Key
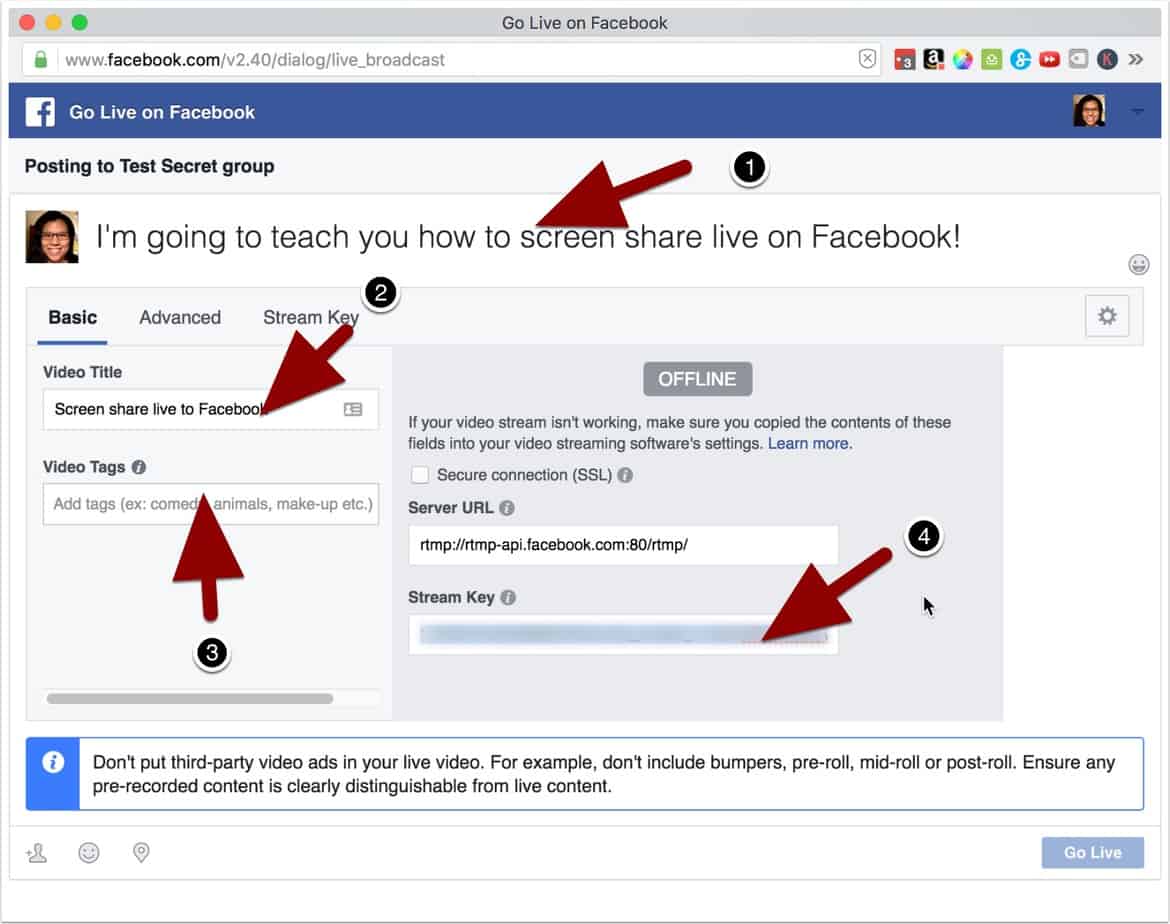
Now your popup dialog box will change to look something like this.
- Enter a description of your live video if you want. It’s optional. Not required if you’re in a hurry.
- Enter a Title. Again optional.
- And Enter Tags. Optional as well but might be helpful if you want others to find this video.
- Over on the right side, you will see something called a Stream Key. It’s a long line of text and numbers. You’ll want to copy that. Make sure you copy the entire string!
Note: Each time you go live, you’ll need a new Stream Key.
Add Your Stream Key Into OBS
Let’s leave the Facebook Dialog for a minute and return to OBS on your desktop. In order for OBS to start streaming, it needs your Stream Key. So we’re going to do that now.
Click On Settings.

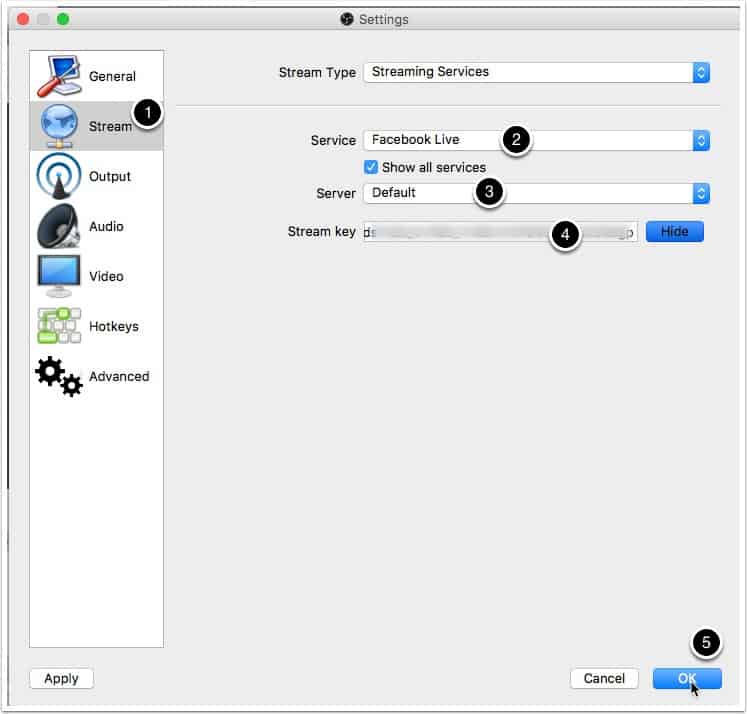
Paste Your Stream Key
- Click the Stream tab on the left.
- Select Facebook Live for the Service.
- Leave Server as Default.
- Now paste your Stream key in the stream key field. If there’s something in there already, delete it first, then paste your fresh stream key.
- Click OK.
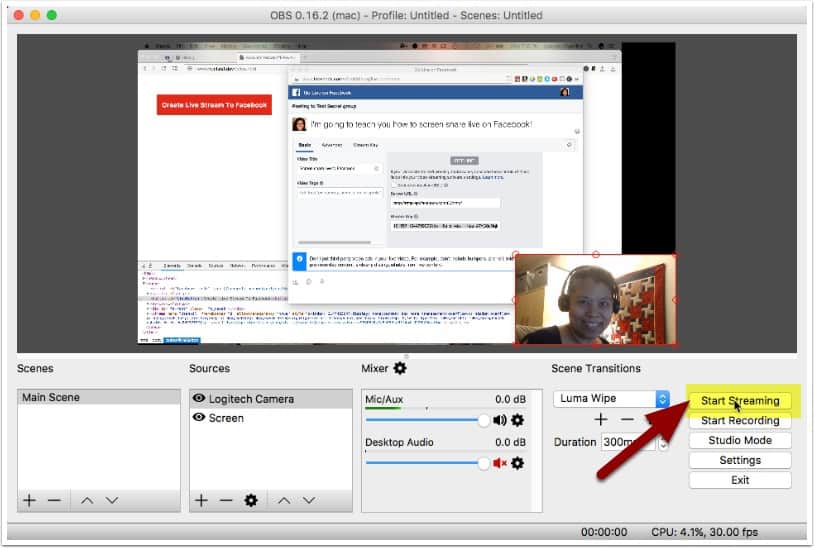
Start Streaming
Woo Hoo! You’re now finally ready to begin streaming! I know it sounds like a lot of work and a ton of steps but I promise, most of this is one time setup. Click Start Streaming. Don’t worry, you’re not live yet. You’re basically just starting your video stream so Facebook can pick it up.
Confirm Streaming
You’ll be asked if you’re sure (YES!)

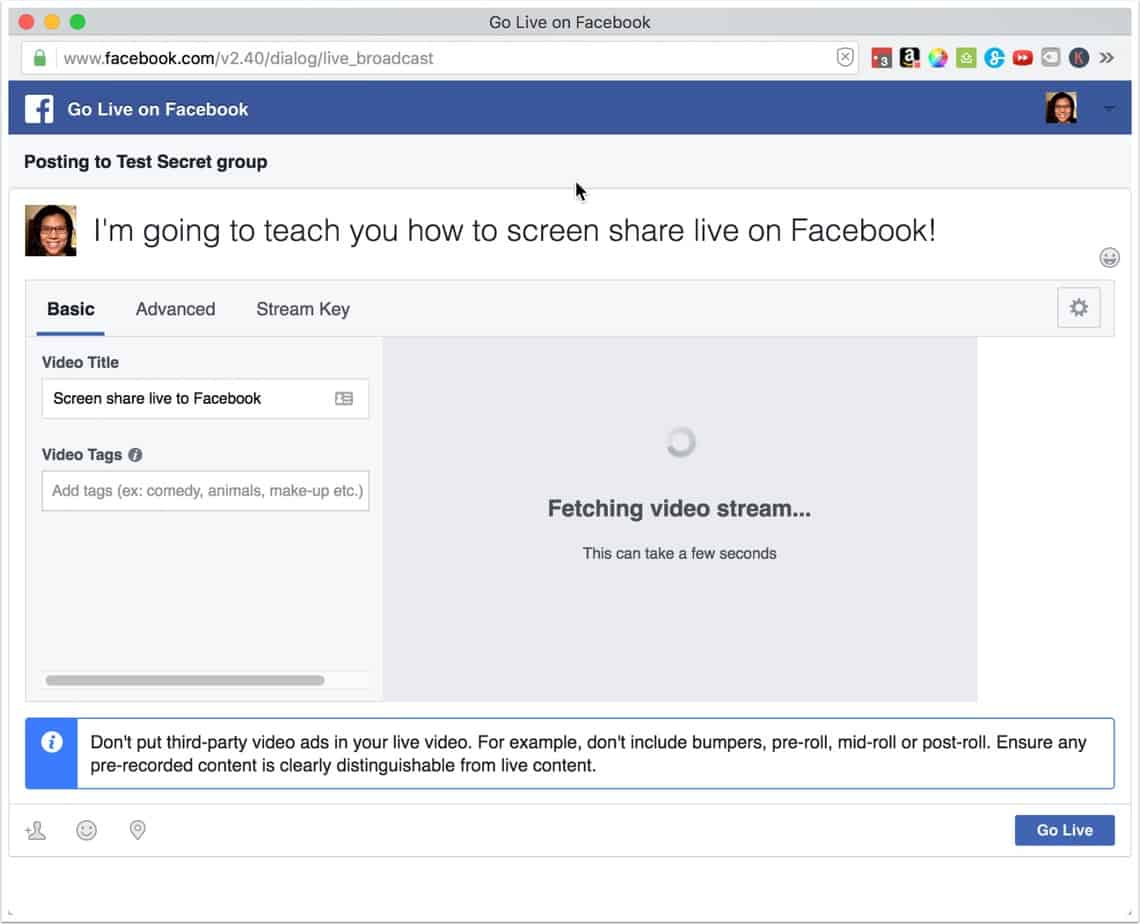
Wait For The Video Stream
Back over to your browser popup dialog. You should now see the preview area has changed and it’s telling you that Facebook is trying to fetch your video stream. Be patient and wait until you see your desktop or your video. Do not click on Go Live yet.
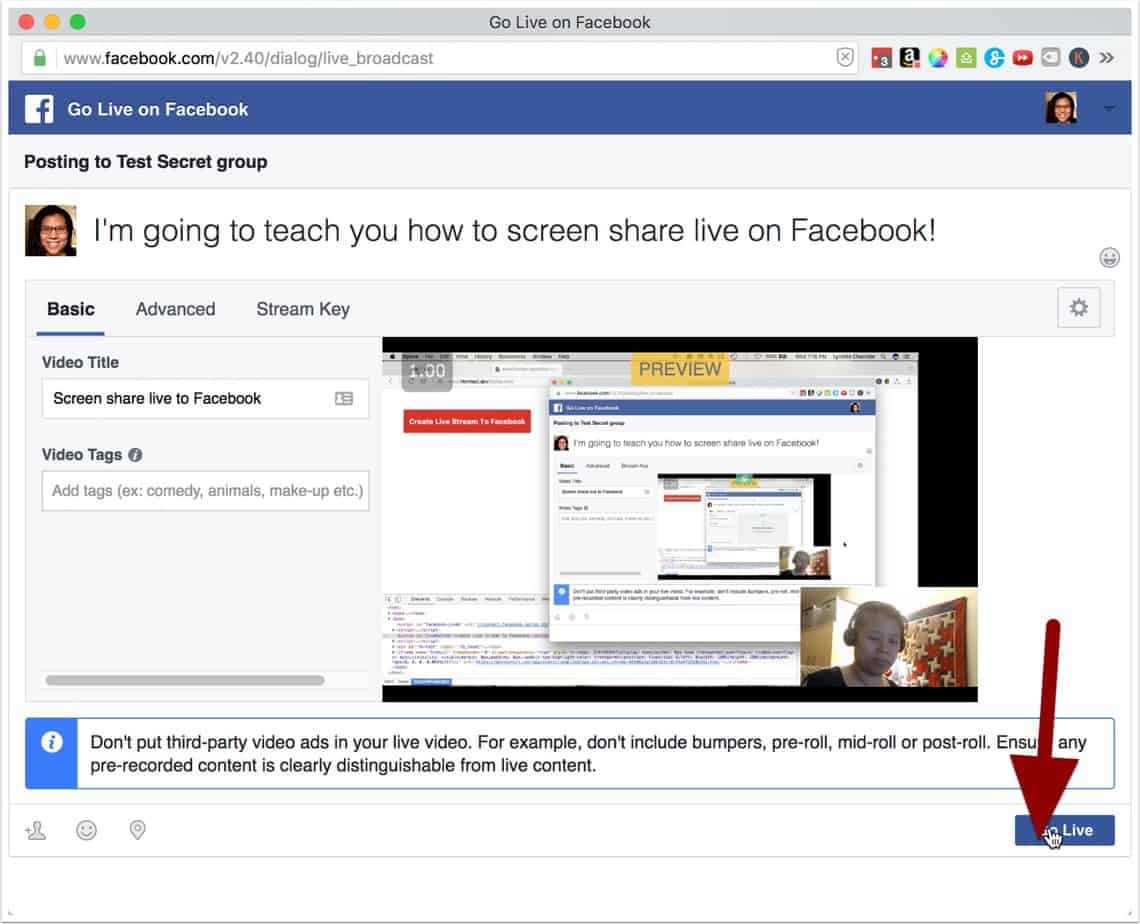
Go Live!
Finally! Once you see your screen and video preview, now you can go live. Take a deep breath and click Go Live!
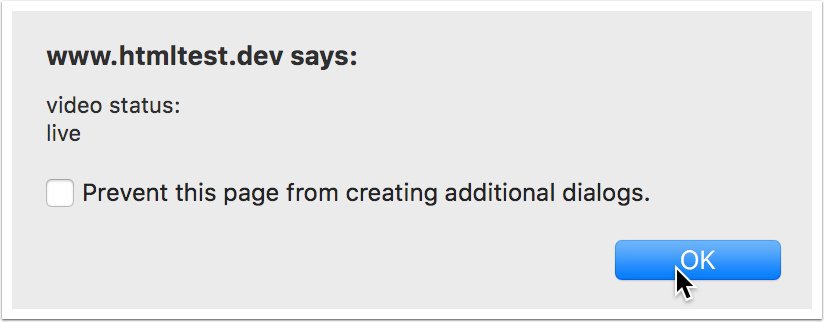
Video Status Confirmation
Your browser will tell you that your video status is live. That means you’re on! Click OK and start talking!
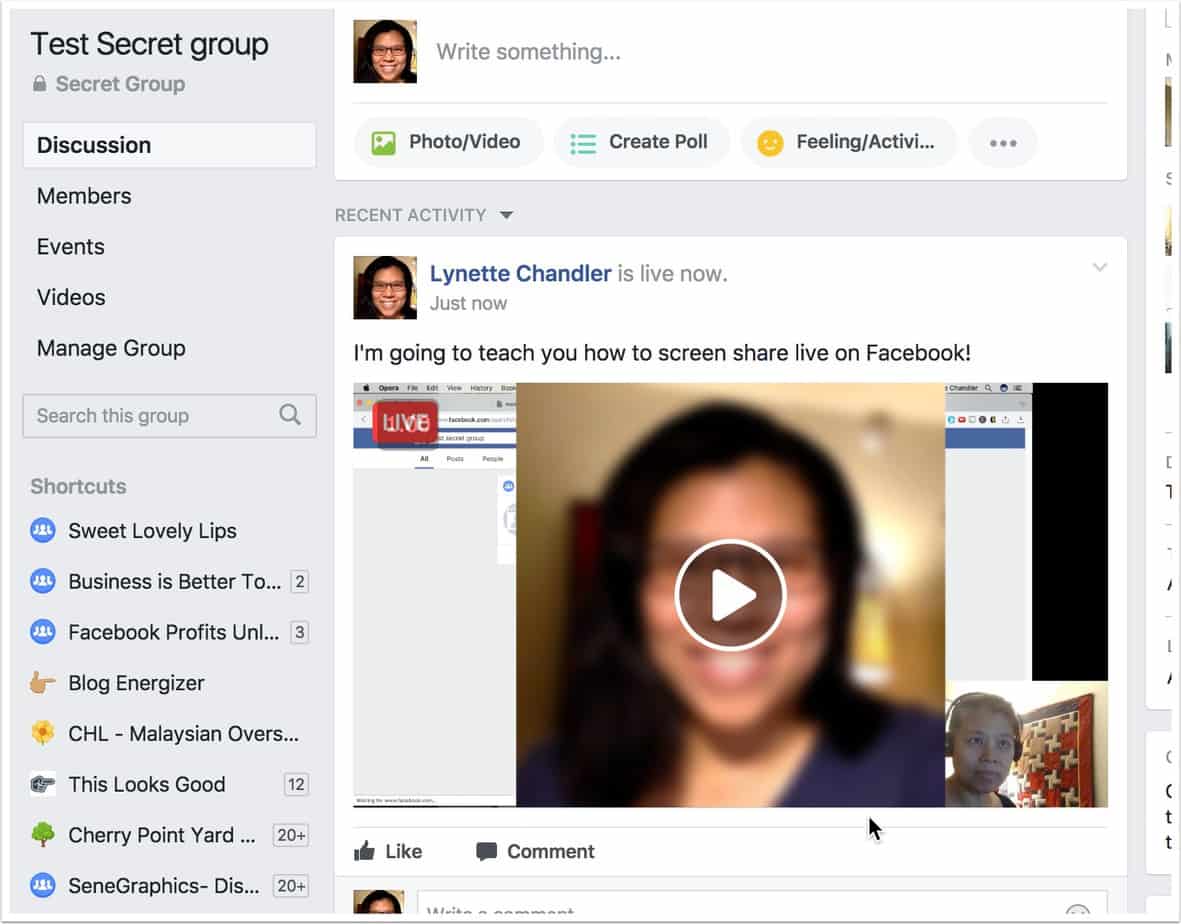
How Do You Know You’re Live For Real?
That’s easy. Go to the group you are broadcasting live to and look for your live video post. If you do this immediately, you should be the last post on the very top.
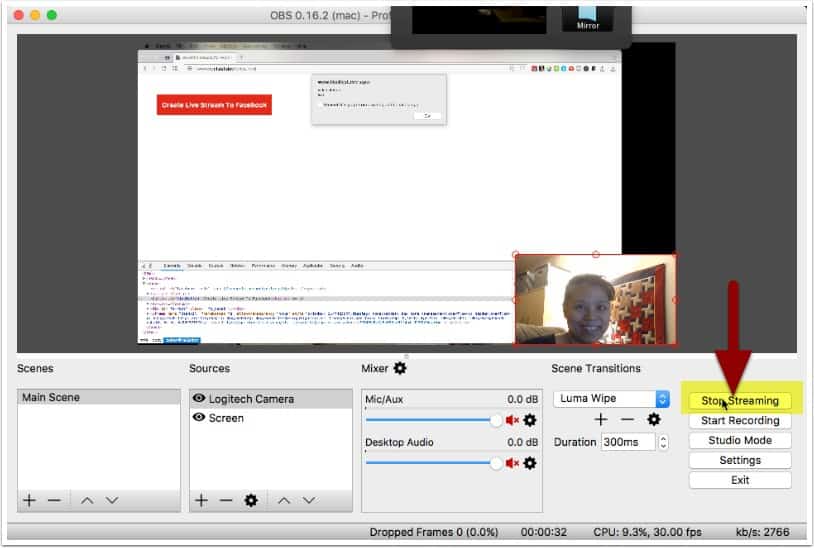
How Do You Stop Streaming?
That’s easy too. Go back to OBS on your computer. Click Stop Streaming.
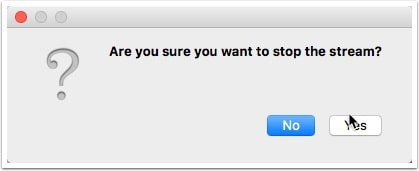
Stop Streaming Confirmation
Once you attempto to stop streaming, you’ll see this pop up. Click YES.
Depending on your connection, it might be immediate or it could take a few minutes to completely send over the last bits of video to Facebook and come to an end.
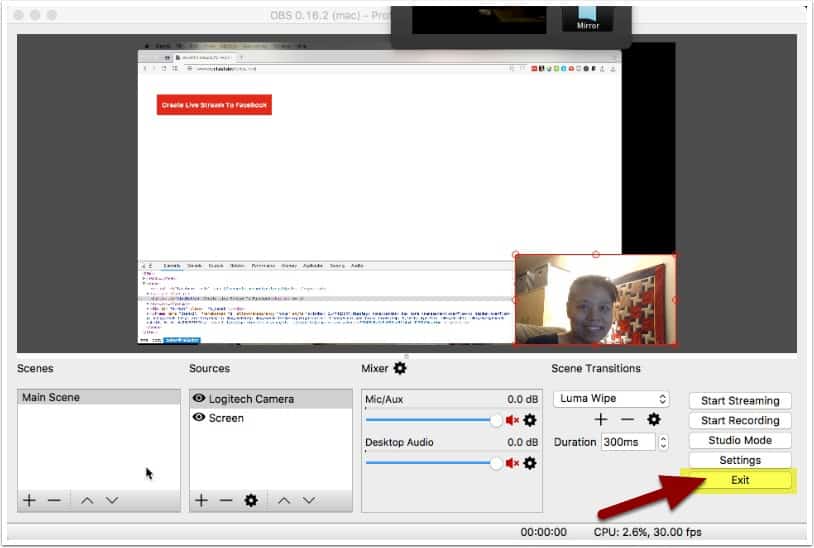
Exit OBS
Now that you’re done live streaming, you can click Exit and close out OBS. The nice thing about OBS is, it’ll save your desktop and video settings so next time you want to live stream, it’s all there. You just need to get your stream key and go.
Do You Want A Hands-Free Business?
Then get this guide to help you systemize your business so you'll have more time working on your business.
Hey! I want to make sure you know what you're getting here. In addition to the guide, you will also receive our memo that includes special offers, announcements and of course actionable information.